
Note: This guide is a work-in-progress and not finished yet. It will be updated soon (André, 2020-10-15)
A common problem: It's winter time, your horse coughs, and the only hay available is so dusty that you wouldn't want to feed it. The solution was found as early as 1994 by Werner Balsinger with his WEBA hay-conditioner: To steam the hay before feeding to bind dust and allergens, therefore preventing the irritating effect on bronchia.
Since then, a number of commercial clones picked up his idea (to Mr. Balsinger's displeasure). Additionally, several DIY projects and how-to guides show how to build similar steaming boxes on your own.
However, the entry threshold for anyone willing to just test a steamer with his or her own horse is still high: Commercial boxes start at 230 US$ (200€ / £200 / CDN$310 / AUS$311), or to build one of the DIY projects, you need a lot of craftmenship and patience.
Quick, easy and cheap - the entry solution for just $60
This How-To explains how you can build a working hay steamer using just three parts. No craftmanship skills are required, and the total costs are just about US$60 ( or 50 €/£, CDN$ ???, 80 AU$) .
I am successfully using this solution for three years now. An upgrade to one of the more sophisticated DIY models, like the WEBA solution or the Cavallo model, is always possible while reusing the existings parts.
Parts needed for the DIY hay-steamer
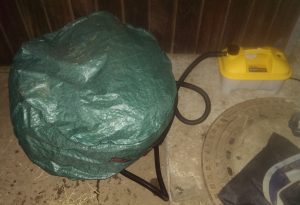
You just need three components for the hay steamer:
- the steam generator
- a steam-tight, heat-proof steaming bag in which the hay gets steamed
- a timer for automatic power-off
The choice of components:
1. The Steam Generator
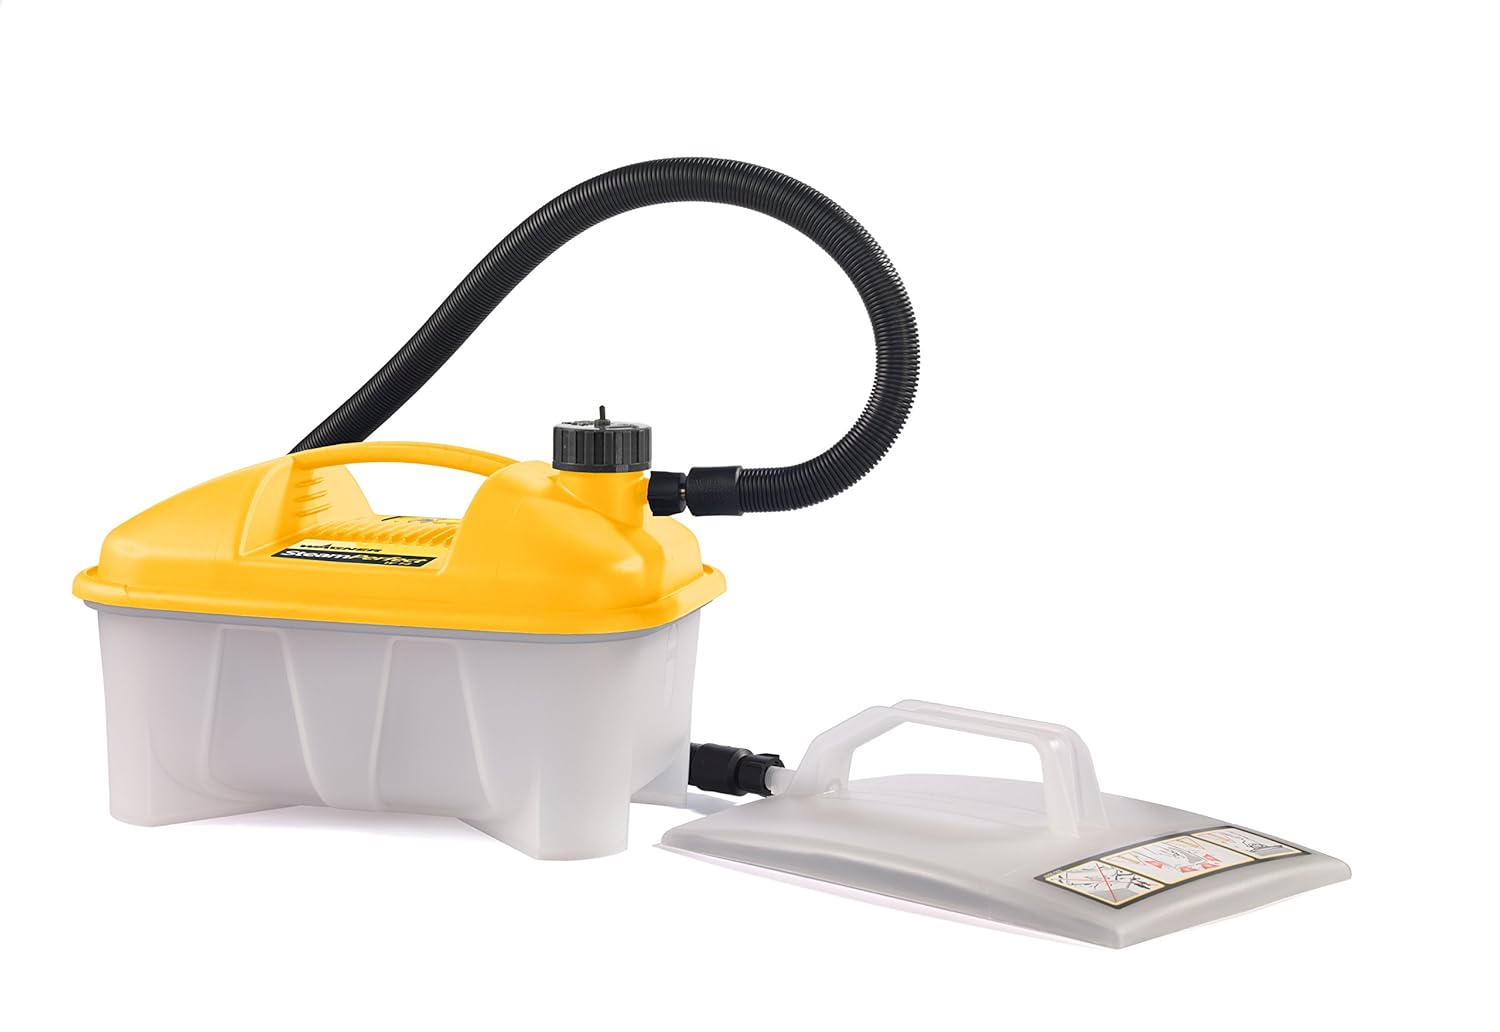
The cheapest steam generator the Wagner W16 (220-240V) / Wagner 715 (110V), which is originally made for wallpaper removal.
This device isn't much more than a fully sealed electric kettle with a tube and handle: The pressure-sealed container can be filled with up to 5 liters of water through the pour hole. When plugging the power cable into the socket, an electric coil at the bottom of the device heats up the water until boiling, followed by releasing stream through the tube and the optionally connected wall nozzle for up to 70 minutes.
The device is available in many countries though Wagner or one of the local subsidiary brands, having different coloring of either yellow or grey.
I recommend ordering directly from the manufacturer through Amazon, to ease returns in case of defects or failures. Here is where to get it:
US
The steamer is available as Wagner 715 (110V) on Amazon directly from the manufacturer Wagner Spraytech for $50 including shipping. (updated 07/2021)
Canada
Same as for the US, the steamer is available as Wagner 715 (110V) on Amazon Canada for CDN$80 including shipping. It's cheaper at Lowe's home improvement stores for just CDN$70 (updated 10/2020)
United Kingdom
For UK there are two devices to choose from:
- Earlex SS125 with about 4 liters of water capacity. It's the same as the older model Wagner W14, which I use too.
It's available at Amazon UK for - Earlex SS77, which is the same as the Wagner W16, with 5 liters capacity. It costs at Amazon UK including shipping.
Both are them are well suited for use as a steam generator. If you need the larger capacity for more hay, buy the SS77.
Additionally, the original-labeled Wagner W16 is available too: In it's old version for and new version for
Australia
It's way difficult and pricey to get the Wagner steamer in Australia. The Wagner W15 is available on eBay Australia for AU $175, but you might be able to find better choices. Make sure to get the European 220-240V version W15, not the US one.
2. The Steaming Bag
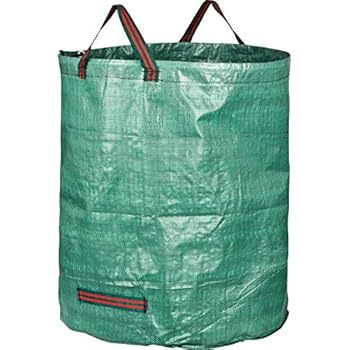
There are many different types of bags, but only very few are suitable to be used as a steaming bag:
The bag must be:
- water- and (mostly) damp-proof
- strong and tear-resistent
- heat-resistent up to 212°F/100°C
- may not release harmful substances
Polypropylene (PP) provides high resistance at high temperatures. This differs from the much more common Polyethylene (PE), that most pouches, shopping bags and waste bags are made of. Polyethylene already starts to melt at about 192°F/80°C - which isn't enough to withstand the steam without getting damaged.
Plastic boxes made of PVC/Vinyl (Polyvinyl Chloride), which are often used for hay steamers, are heat-resistent indeed, but may release toxic plasticizers, especially when heated. Polypropylene instead does not contain any plasicizers.
There are many very similar looking products on the market, but you need to check carefully if they meet the requirements. I used the product linked below under rough conditions for more than 1½ years until first the small holes showed up. So expect a lifetime of about one year per bag.
A steaming bag with 270 liters / 71 gallons volume fits for two medium-sized hay nets with about 6kg / 13 pounds of hay each. If you need to steam more hay, larger bags are available.
US
You get a pack of 3 bags with 80 gallons each from BTSD-home at Amazon for just US$19 plus shipping.
Canada
A pack of 3 bags with 72 gallons each is available from ValueHall at Amazon for CDN$ 27. You also get the same pack with larger 132 gallon bags for CDN$ 33.
United Kingdom
In UK either get single bags with 270 liters for 10 or a pack of 3 for 20 from GardenMate at Amazon.
Australia
The ValueHall pack of 3 bags with local shipment is available for AUS$ 33 at Amazon. You can also get the larger 132 gallon bag 3 pack for AUS$ 41 there.
Hay net (optional)
You may use the bags directly without a hay net, but it's seasier to handle. I use maxi-3 hay nets from Löwer (Germany). These are made of Propylene as well, can stand the heat, and are free of toxic substances. They are woven "knot free" and without wear, even after many years of use. Löwer ships wordwide.
3. The Timer
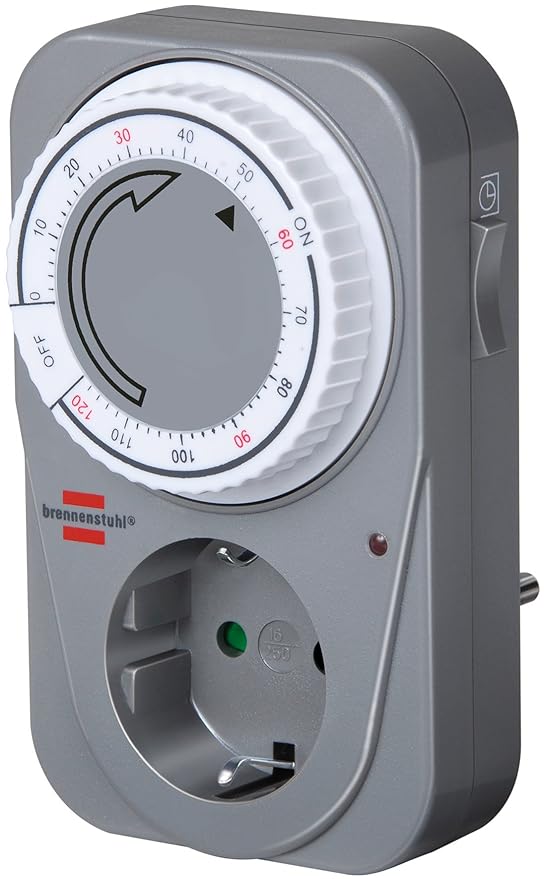
The power-off timer is optional, but highly recommended. The steam generator is supposed to have an overheating protection, but calcification is reason enough to never let the device run dry (possibly even unattended!).
[Section unfinished - list of countdown timer follows. Please be patient.]
US
Canada
United Kingdom
Australia
Assembly and Usage Instructions
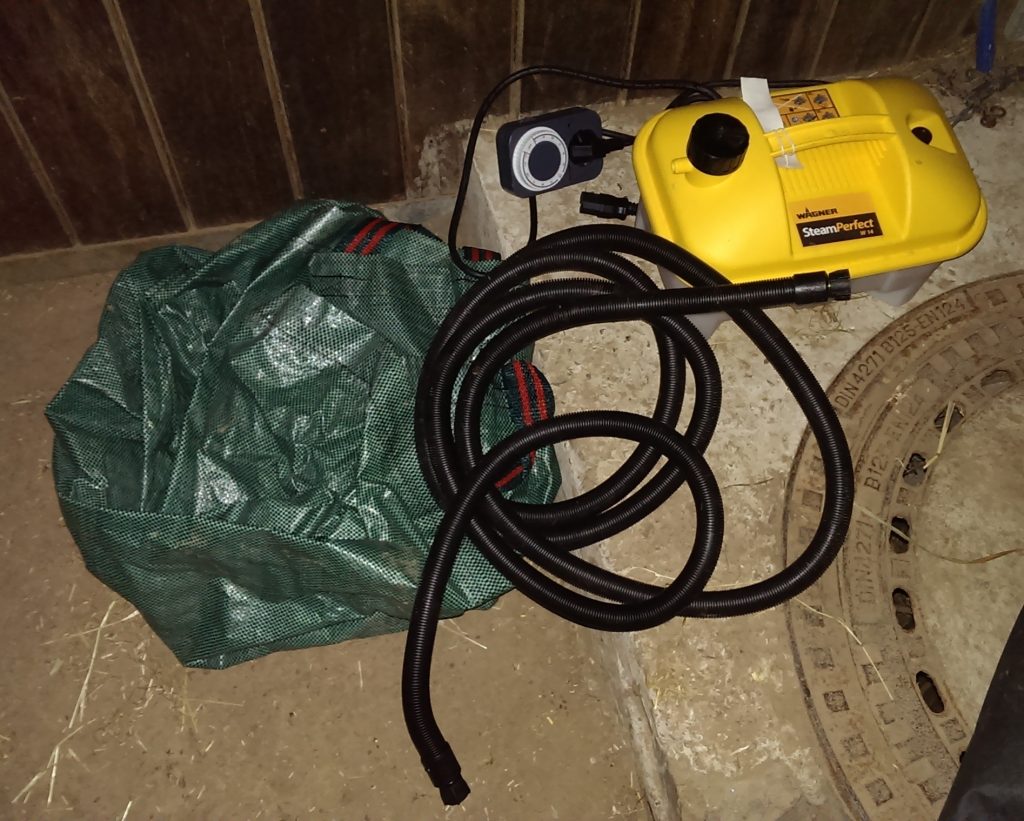
Once all parts are ready, assembly is simple:

Place the tube end in the middle of both nets Unscrew the black or yellow lid and pour water into the steam generator, but not above the marking, which is located at the top of the transparent bottom part. Close the lid without too much force, to avoid damaging the seal over time.
- Pour some water over the hay nets to moist the hay evenly, also inside.
- Place the hay nets into the bag and push them down, so that they fit tightly.
- Place one end of the steam tube on top between both nets. Then connect the other end to the steam generator.
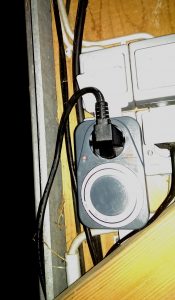
Set the countdown timer to 45 minutes Close the bag around the tube. Then turn the bag upside-down, so that the opening faces towards the ground. As the steam flows upwards, the tube end should be as low as possible now.
- Connect the power cord with the timer, insert the timer plug into the socket, and set the timer to 45-50 minutes. For larger bags up to 60 minutes. If your timer has an "always on" override switch, make sure it off and set to timer mode.
- When time is up, take out the hay nets. After a few minutes of cooling down, open the steam generator's lid and dump the remaining water, which now contains all the limescale.
Notes
- The warm-up time of the steam generator is between 5 and 10 minutes until the first steam gets released. It depends on the water and outside temperature and water volume. Keep this in mind when calculating the effective hay steaming time.
- Moisturing the hay before steaming is important to ensure that all parts of the hay heat up evenly. The steam condenses at already existing water drops, heating the hay with the released energy.
- The bag should enclose the hay tightly, so that less volume needs to be heated.
- The steam generator should be decalcified frequenty just like a kettle, depending on the water hardness. Never let the device run dry and always remove remaining water after use.
- The steaming progress can be easily observed: If everything is set up right, the bag's full surface should become too hot to lay a hand on for longer (>60°C / 140°F).
Note: The text below is not yet translated to English - please check back later
Wie wirkt der Heubedampfer?
Die Wirkungsweise der Heubedampfer ist bislang erst teilweise geklärt. Bekannt ist, daß durch die Befeuchtung allergene Stoffe gebunden werden und dann während des Fressens nicht mehr in die besonders empfindlichen Atemwege des Pferdes eingeatmet, sondern geschluckt werden.
Ein zweiter Effekt ist die Abschwächung allergener Stoffe. Belegt ist, daß die meisten Bakterien und ein Großteil der im Heu enthaltenen Pilze durch die Hitze abgetötet werden (Pasteurisierung, siehe Cavallo-Labortest zweier Heubedampfer). Bestimmte Allergene, zum Beispiel Eiweiße, werden bei diesen Temperaturen inaktiv in Hinblick auf ihr Allergiepotential. Sporen werden hingegen kaum beeinflußt, und auch die abgetöteten Bakterien, Pilze und deren Stoffwechselprodukte bleiben im Heu enthalten. Es ist deshalb unklar, wie groß die Wirkung dieses Effektes ist.
Möglicherweise ist die nachhaltige Staubbindung der Hauptfaktor der Wirkung - denn wenn nichts mehr aus dem Heu in die Atemwege gelangt, kann dort auch keine Reizung stattfinden. Schaut man sich das Heu nach dem Bedampfen an, ist der Unterschied deutlich: Während das einfache Bewässern des Heus zwar einen Teil des Staubes auf der Außenseite der Halme binden kann, werden die Halme selbst jedoch nicht weich. Nach dem Bedampfen ist das Heu dagegen komplett "weichgekocht" wie Gemüse - hier staubt nichts mehr.
Und was sagen die Pferde?
Mein Pferd ist jedesmal begeistert, wenn das dampfende und duftende Heu aus dem Heubedampfer serviert wird - besonders im Winter. Gespitzte Nüstern und Grummeln aus den Nachbarboxen bestätigen das Interesse.
WEBA, Cavallo, Haygain, und Heumaster
Neben dem Eigenbau gibt es noch eine Vielzahl weiterer Eigenbau- und kommerzieller Modelle
WEBA-Heubedampfer
Nach einigen Versuchen mit größeren Behältern kam Herr Weber zum erste populären Modell, der Lösung mit Mülltonne und Tapeten-Dampfablöser:
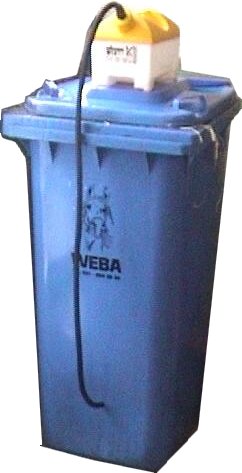
Die Anleitung zum Modell ist leider nicht mehr erhältlich, aber es finden sich auf der ursprünglichen Seite sich noch einige Bilder, Pressetexte und Prospekte.
Cavallo-Modell
Die Anleitung für das Cavallo Modell - laut Herr Weber ein unveränderter Nachbau seines WEBA - ist dagegen weiterhin zugänglich, als PDF zum Ausdrucken auch von einer Tierklinik ein der Schweiz zur Verfügung gestellt.
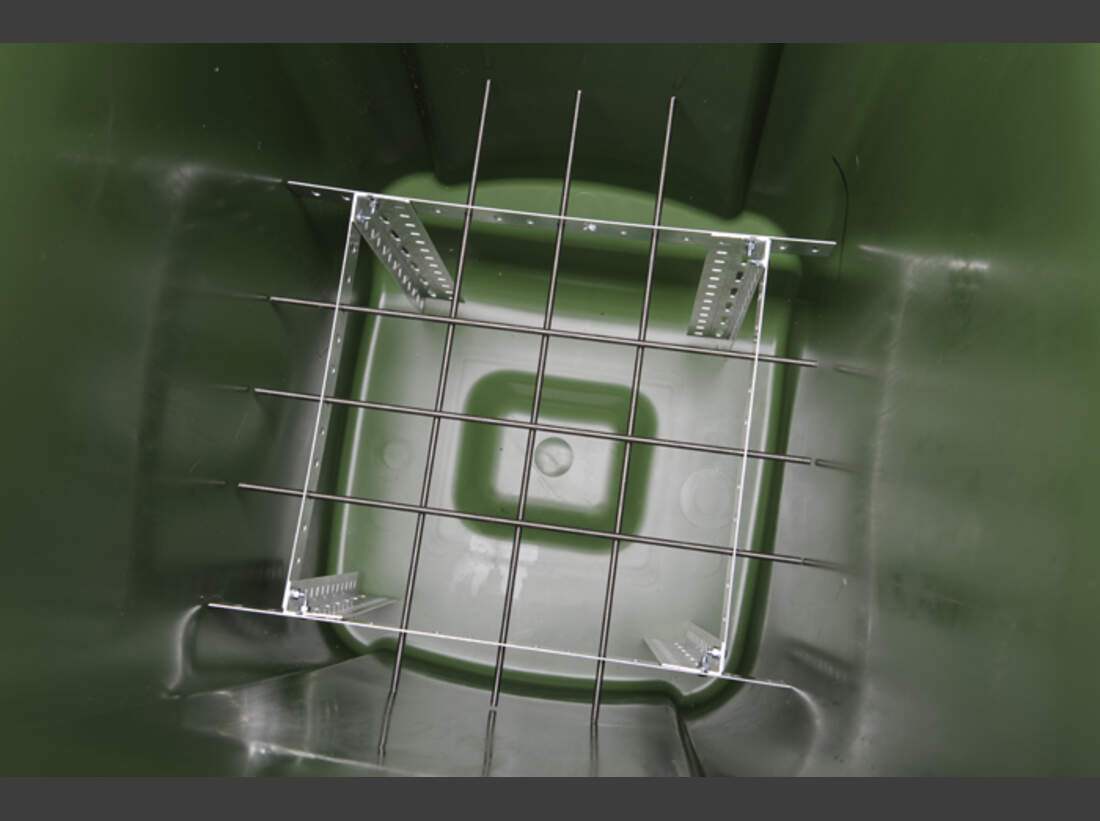
Statt des Sacks wird hier eine umgebaute Mülltonne als Dampfbehälter verwendet.
Vorteile gegenüber der Sack-Lösung sind das erheblich größere Volumen und die gleichmäßgere Dämpfung des Heus, besonders im unteren Bereich. Erreicht wird dies durch ein eingesetzes Gitter, was den Bereich darunter zur Dampfausbreitung und als Ablauf freihält.
Nachteile sind der größere Aufwand für das Einsetzen des Gitters (solle rostfrei/Edelstahl sein), der Platzbedarf, und die höheren Kosten. Die günstigste große Mülltonne, die ich hierfür gefunden habe, ist die Sulo 240 Liter mit einem Preis von 60-70€ bei Amazon einschließlich Lieferung. Weitere Probleme sind die aufwendige Reinigung - Reinklettern oder Kippen zum Ausspülen - und das Material Polyethylen (PE), das bei diesen Temperaturen anfängt weich zu werden, so daß sich die Tonne verformen kann. Weichmacher sind außerdem enthalten.
Wer auf dieses Modell umsteigen möchte, kann den Wagner W14 dabei weiterverwenden.
Haygain
Der Haygain als das bekannteste professionelle Gerät hat eine höhere Dampfleistung und einen stabilen, leicht zugängigen Behälter.
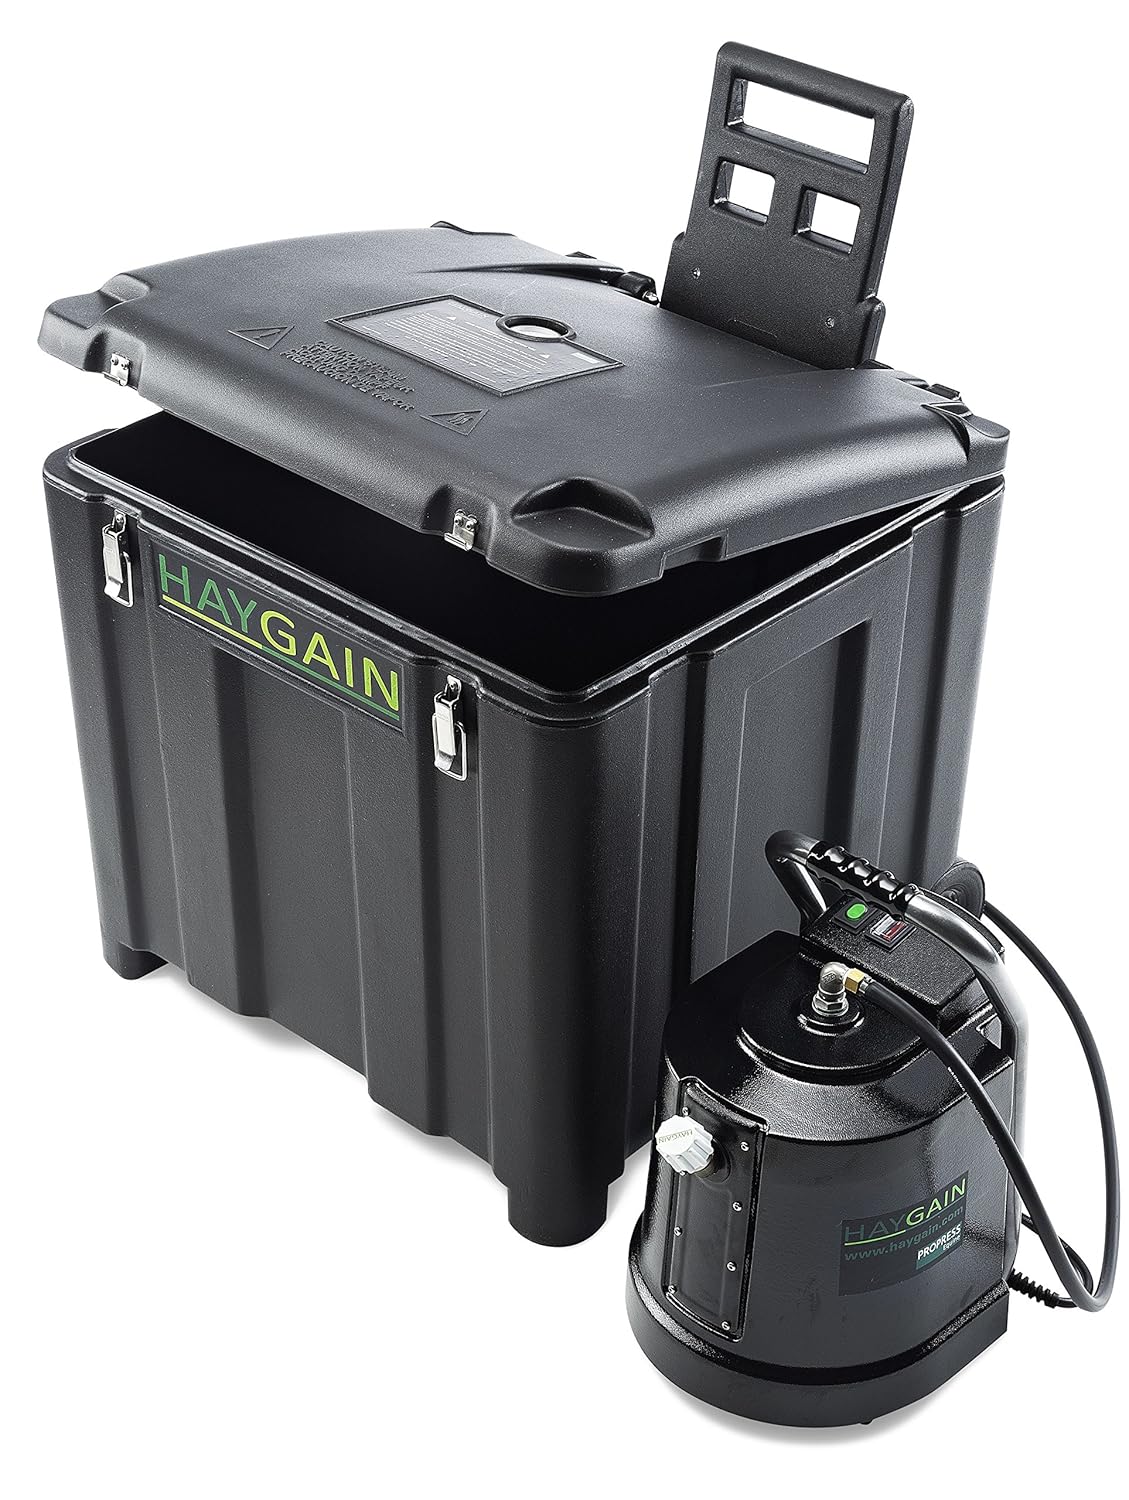
Detailinformationen zum Haygain finden sich im Test von Cavallo.
Die Leistungsfähigkeit des Gerätes ist unbestreitbar, ob die höheren Temperaturen und gleichmäßigere Erhitzung gegenüber den Eigenbau-Varianten jedoch tatsächlich einen therapeutischen Vorteil bei Husten bieten ist nicht erwiesen - insbesondere, falls der Haupteffekt durch die Staubbindung erzielt werden sollte, worin sich die Modelle kaum unterscheiden.
Auch der Preis von 1.750,-€ beim Hersteller über Amazon (Stand 7/2017) schreckt ab, so daß das Gerät eher für den professionellen Bereich oder in größeren Betrieben geeignet erscheint als für Privatanwender.
Es existieren auch noch weitere Modelle: Mit dem "HG-Go Travel" eine Sack-Variante für unterwegs für 1.100,-€ sowie die Mini-Ausführung HG-One für 890,-€ mit einer kleinen Kiste mit nur 170 Litern Volumen.
Zu danken ist Haygain jedoch zu den durchgeführten Studien zur Wirkung von Heubedampfung, die sich in weiten Teilen auch auf die anderen Geräte übertragen lassen.
Heumaster
Gerd Römbke, seit 2009 Distributor des englischen Haygain, vertreibt den Heumaster als Eigenentwicklung.

Der Heumaster ist sehr ähnlich zum Haygain, auch preislich liegt das Gerät in einem ähnlichen Bereich. Die Reinigung soll hier gegenüber dem Haygain nochmal vereinfacht sein. Drei Varianten mit verschiedenen Volumina sind verfügbar: HM 120E / 300 / 600 mit 200 / 300 / 600 Litern zum Preis von knapp 1.150,-€ / 2.300,-€ / 3.000,-€ (Stand 9/2020).
Fazit
Heubedampfer gibt es je nach Geschmack und Geldbeutel - von der Minimalvariante für 50,-€ bis zu 2.500,-€ ist alles dabei. Während die Wirkung zumindest im Cavallo-Test ähnlich war, helfen alle bei Husten durch staubiges Heu.
Man sollte sich jedoch klarmachen, daß ein Heubedampfer nicht alle Probleme lösen kann: Vom Schimmel erzeugte Endotoxine, die Vergiftungen hervorrufen können, verbleiben im Heu - auch wenn nichts mehr in den Atemwegen landet. Erster Schritt sollte deshalb immer bleiben, die Heuqualität zu verbessern. Hilft das nicht, sind Heubedampfer eine gute Lösung.
Hi there,
Thank you so much for the easy hay steamer tutorial! I did want to let you know that the BTSD gardening bags that you linked to (for US and Canada) is “durable polypropylene woven fabric with water-repellent PE coating”.. Some other brands don’t indicate that there is a PE coating, but I think it’s likely that most have one.
Regardless, your method is great and I plan on figuring out a way to make it work for me 🙂
Hi Kelsey, thank you so much for this hint! Didn't think about that before, but you are probably right that most PP bags will have a PE coating. The reason is that PP is not UV-resistant, and as these bags are made for use in the garden, they would quickly wear in sunlight if they hadn't got a coating.
I'm not aware of any better alternatives without plastics, though. You might try a metal bucket, but it's difficult to heat up. So the coated bags, having just a thin PE layer to protect them from sunlight, might still be a viable solution. If you happen to find a better one, please let me know! Best, André